
Who said you need to spend hundreds of dollars on a brand new portable camping air conditioner? There are so many DIY solutions on the internet to make a DIY tent air conditioner, but I found one on Youtube that really impressed me, and I’m sure it will work great in any tent.
It only uses an old icebox cooler (here’s a cheap icebox that you can buy and get delivered quickly), a cheap 10 dollars small fan, and a modest solar panel (can run on batteries as well). So if you can bring some ice with you when camping, I can’t see why you shouldn’t try this out.

To find out how you can fit all these together you can either watch the video at the bottom of the post or follow the steps I mention.
Page Content
Step 1: Find an old ice cooler that you don’t use anymore
Any used ice cooler will do the job. If you can’t find one, try to look around for Styrofoam Ice Chest, which will cost you only 2-3 dollars, and it’s widely available.
The idea is to have a box that will prevent heat transfer as much as possible to prevent the ice from melting. Plastic boxes or metal boxes without any layer of insulation will not work.
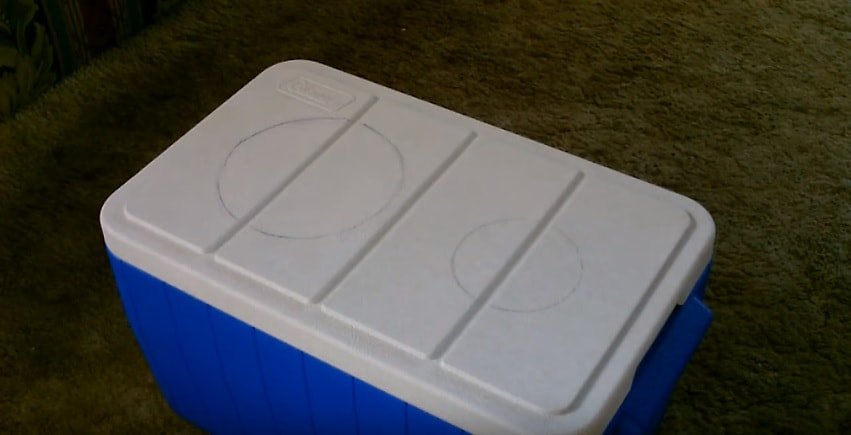
Step 2: Markdown the holes for the fan and the duct

Now that you have the box in place, it’s time to measure the holes for both the fan and the small piece of the duct that you are going to use.
Make sure you do this as accurately as possible so that you’ll have no trouble sealing the holes. For the plastic tube/duct it should be simple enough, but when you get to mark the one for the fan, you need to check that the fan will no go all the way in.
Most of them have two guard metal meshes (in the front and the back), joined together by a collar that’s a little bigger than the mesh. If possible, mark the hole so that the collar will rest on the box and just the front mesh guard will get in the cooler.
Step 3: Drill and cut the holes out
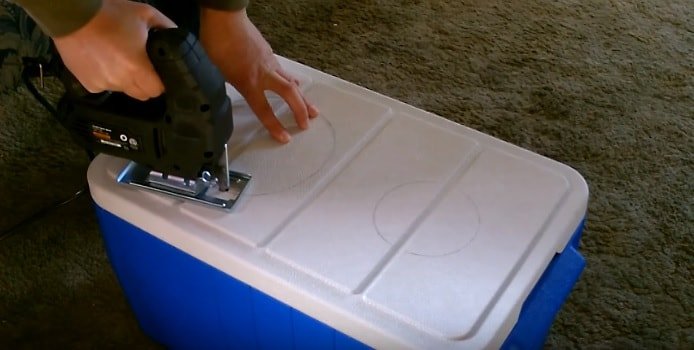
The holes are marked, and now you need to start cutting them out. To make the job easier, a jigsaw and a combi drill will be very useful if the box is made out of plastic. If you went for the styrofoam box, all you need is a knife.
You need to drill a small hole on the edge of the marking and then use the jigsaw to cut the rest. To be fair, a small handsaw will do the trick if you don’t have power tools.
Step 4: Fit the fan and the plastic 90° bend (elbow)
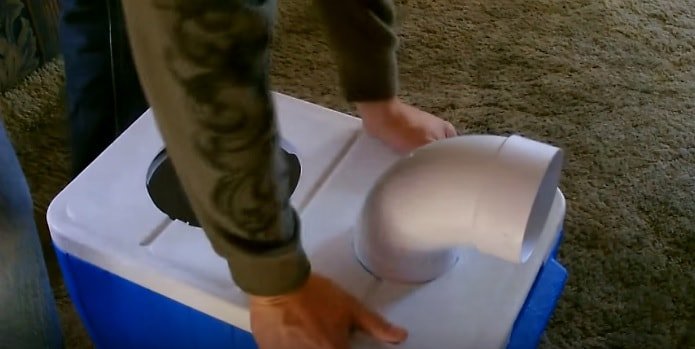
If your holes are the right size, both the fan and the plastic bend should go in easy. At this point, you need to choose if you want to seal the holes; by doing this, you’ll make the unit a bit bulky, making it harder to carry in a small car boot, but you’ll better prevent the heat transfer. Here you can find a cheap plastic elbow (Amazon link)
Step 5: Get that ice in

This DIY air conditioner will use the heat transfer to work. The more cold surface you have (in this case, the more ice there is), the colder the air drawn in by the fan will get.
As you can see, the guy that came up with the idea used a massive block of ice. This way, he made sure that the ice will not melt too fast and the air will have more cold surfaces to touch.
I know that carrying a huge piece of ice to a campsite is not practical, so you may want to freeze some water bottles and use them.
Step 6: Connect the fan to a battery or solar panel
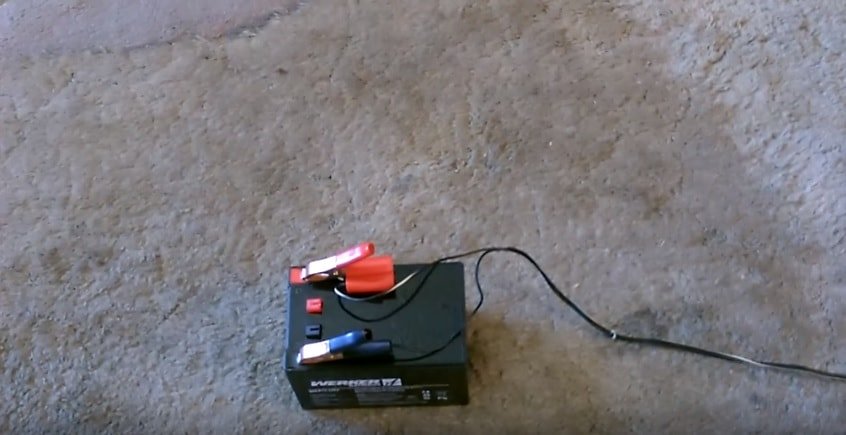
The type of battery that you use will determine how long the air conditioner will work. In this example, the guy is using a 12V battery.
A solar panel will work great, and you don’t need to worry about the power.
How did it do
At the beginning of the test, the temperature in the room was around 80°F. The device managed to blow cold air at a temperature of 42°F – that’s impressive. The huge chunk of ice ended up melting completely after about 5h. I imagine that inside a tent that’s overheated, the ice can melt even quicker. So, perhaps filling the ice cooler with a much bigger ice block will work better.
If you want even colder air, you can try to use something to lift the ice off the bottom of the cooler. This way you’ll increase the heat exchange and the performance at the same time. The downside is that the ice will melt down even faster.
Conclusion
We all hate the scorching hot day that makes tent camping a horrible experience. And I like the idea of having a cheap tent air conditioner, but the only issue I have with this DIY design is that the ice melts down too fast. I’m not sure that this can be improved, as the main factor that melts it down is the hot air drawn in by the small fan.
Other than that, if you choose to build one with the foam box, it shouldn’t cost you more than 15 dollars (excluding the battery), and it’s worth trying.
The technical specifications
The fan used in this concept was a 12V DC with 10W, 0.8A. The solar panel is 15 Watts or 1 Amp.